
Blade Design
Single vs. Double Bevel Edges Explained
Most Western knives use a double bevel edge without anyone thinking twice about it, but single bevel (chisel ground) edges show up often enough…
Blade Design
The classic hard skill: slotting a guard, filing to a press fit against the shoulders, soldered vs pinned vs mechanical, and finishing in place.
2 min readWritten by Rich LinvilleFree to read
Nothing separates the serious maker from the scale-slapper like a fitted guard: a slotted block of metal pressed gap-free against the blade’s shoulders. It is the craft’s classic patience test — pure layout, filing and honesty — and the skill transfers to every bolster and fitting after it. Here is the method that produces the no-light fit.
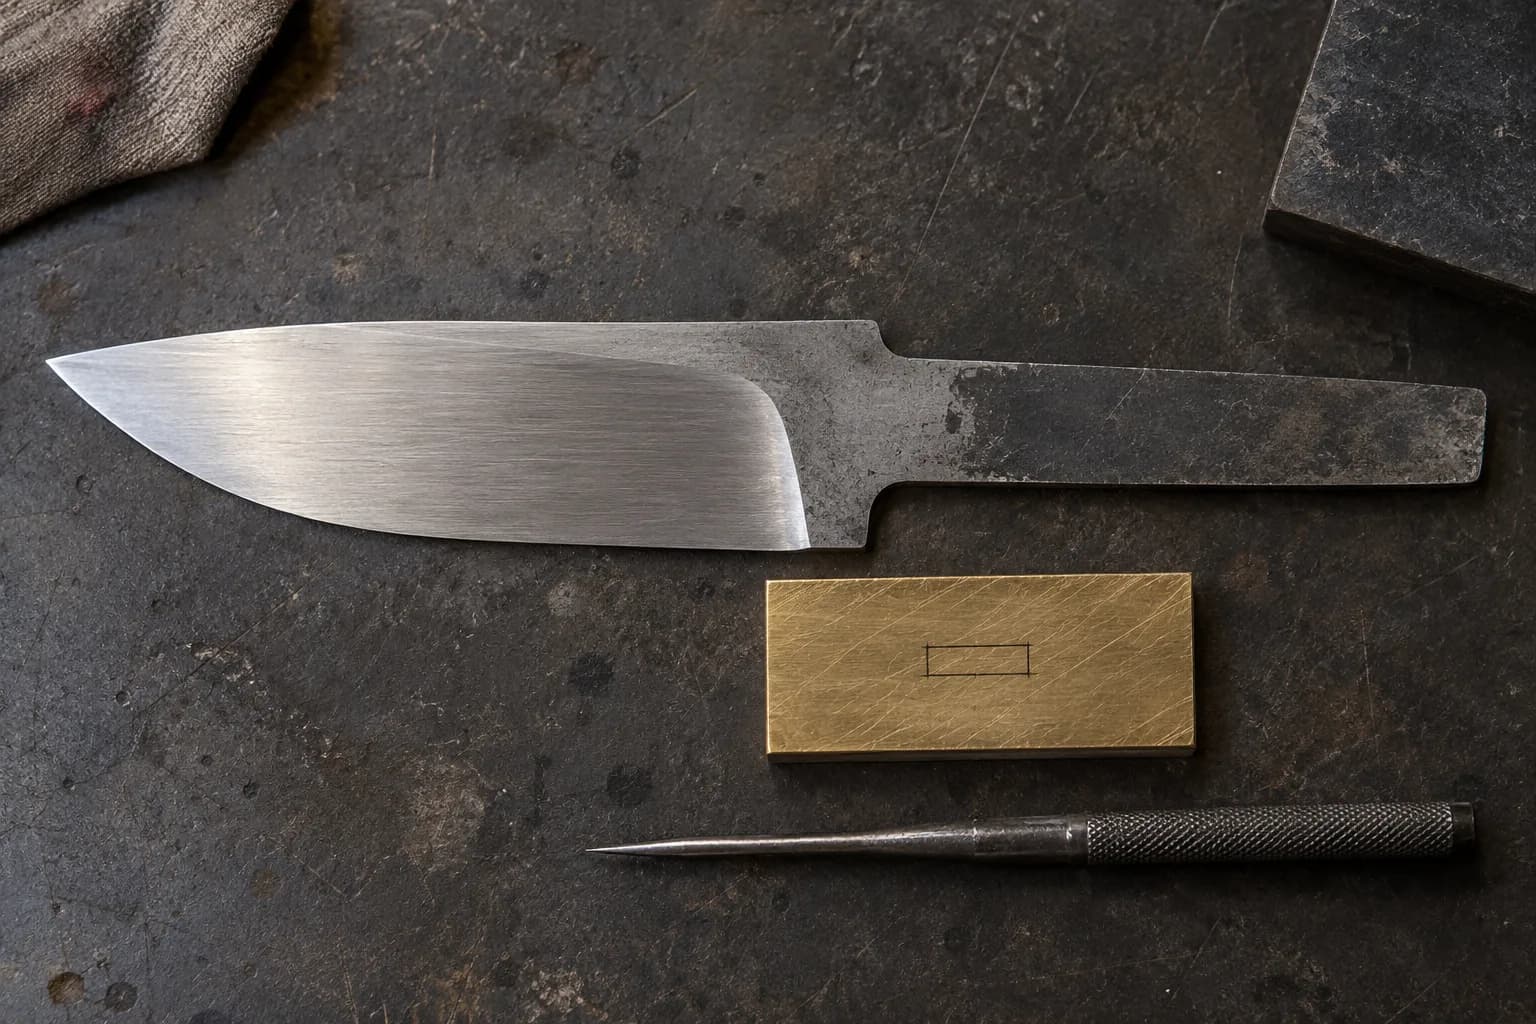
Guard stock: brass and nickel silver are the traditional teachers (soft enough to file willingly, handsome finished), stainless the durable upgrade that files back. Thickness 1/4 to 3/8″. Layout starts from the blade itself: scribe the tang’s cross-section — at the shoulders, not the tip of the tang — onto the guard blank, centered, with the scribe line INSIDE the final slot by a filing allowance. The fit you are chasing is a press fit onto the tang, sliding home to seat dead against the shoulders.
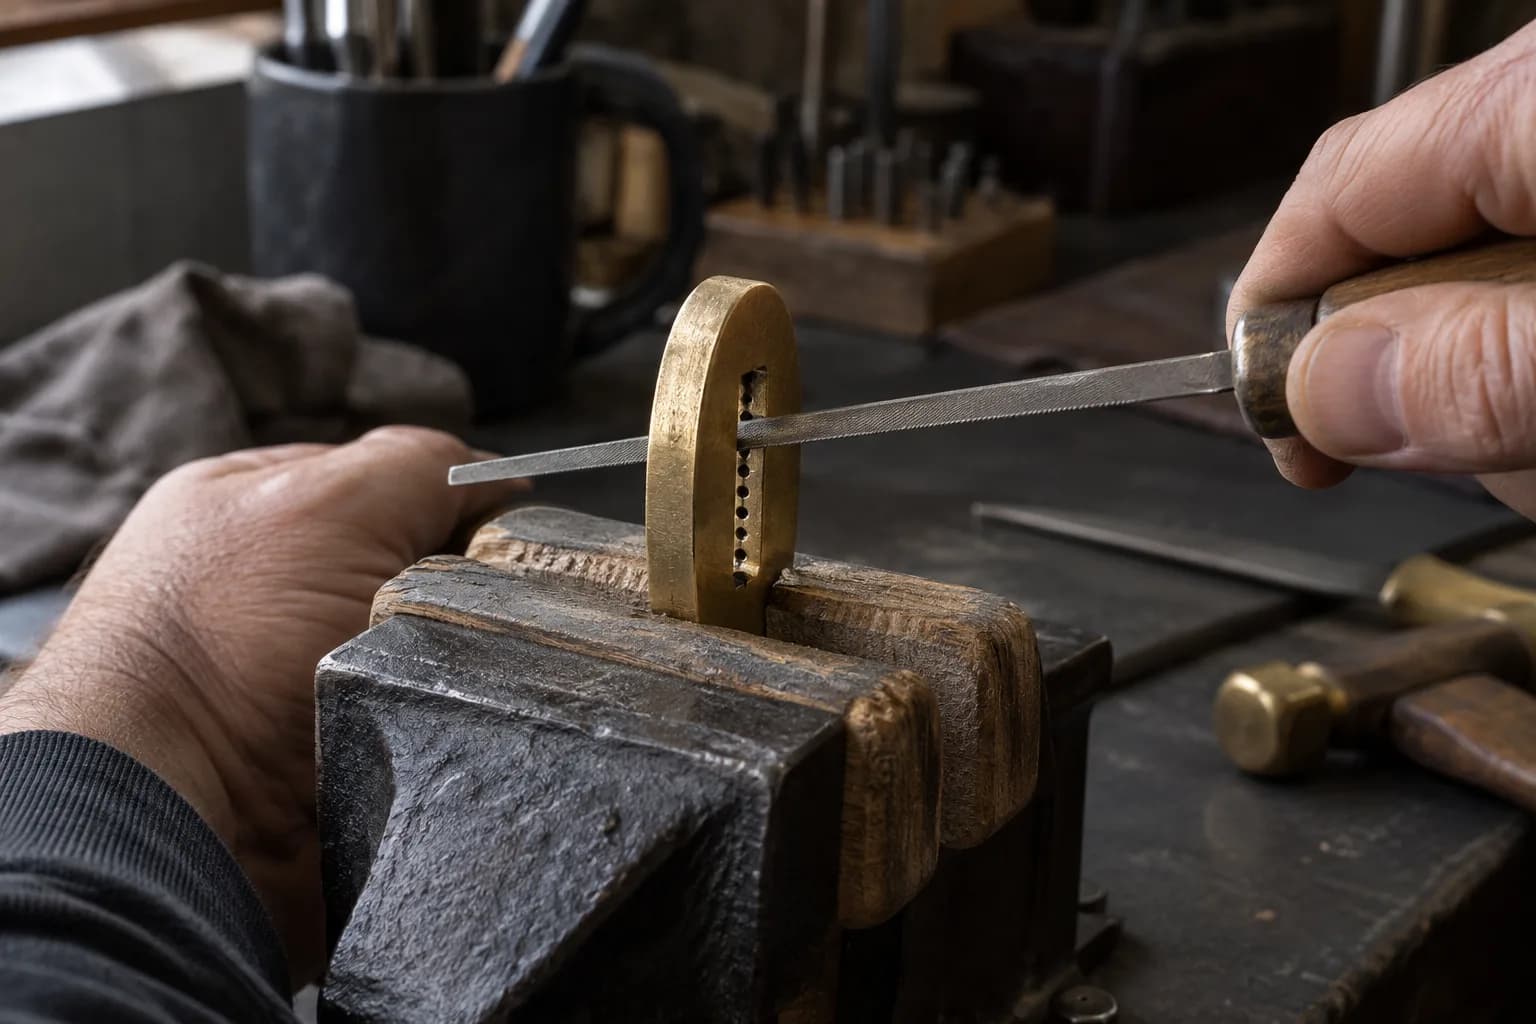
The working sequence: chain-drill the slot (a row of holes inside the layout, sized under the tang thickness), knock out the webs, then file to the line — a warding file for the flats, needle files for corners. The pro move that makes the press fit possible: file the slot to fit the TANG’S WIDEST POINT snugly, then draw-file a whisper of taper so the guard slides easily down the tang and tightens over the last fraction of travel. Test constantly against the actual knife; the file only removes, and optimism is not a filler.
A gap-free guard is really two fits: slot-to-tang AND guard-face-to-shoulders — and the second one is decided at the grinder, before the guard exists. Shoulders must be square, flat, and in the same plane on both sides (a work-rest job, or careful file work against a guide). Out-of-plane shoulders make a rocking guard no amount of slot-filing fixes. Check with the guard blank itself: seat it, hold the joint to a light, and let the light tell the truth. The finish trick when the fit is close: seat the guard with firm taps, and the press fit burnishes the last thousandth closed.
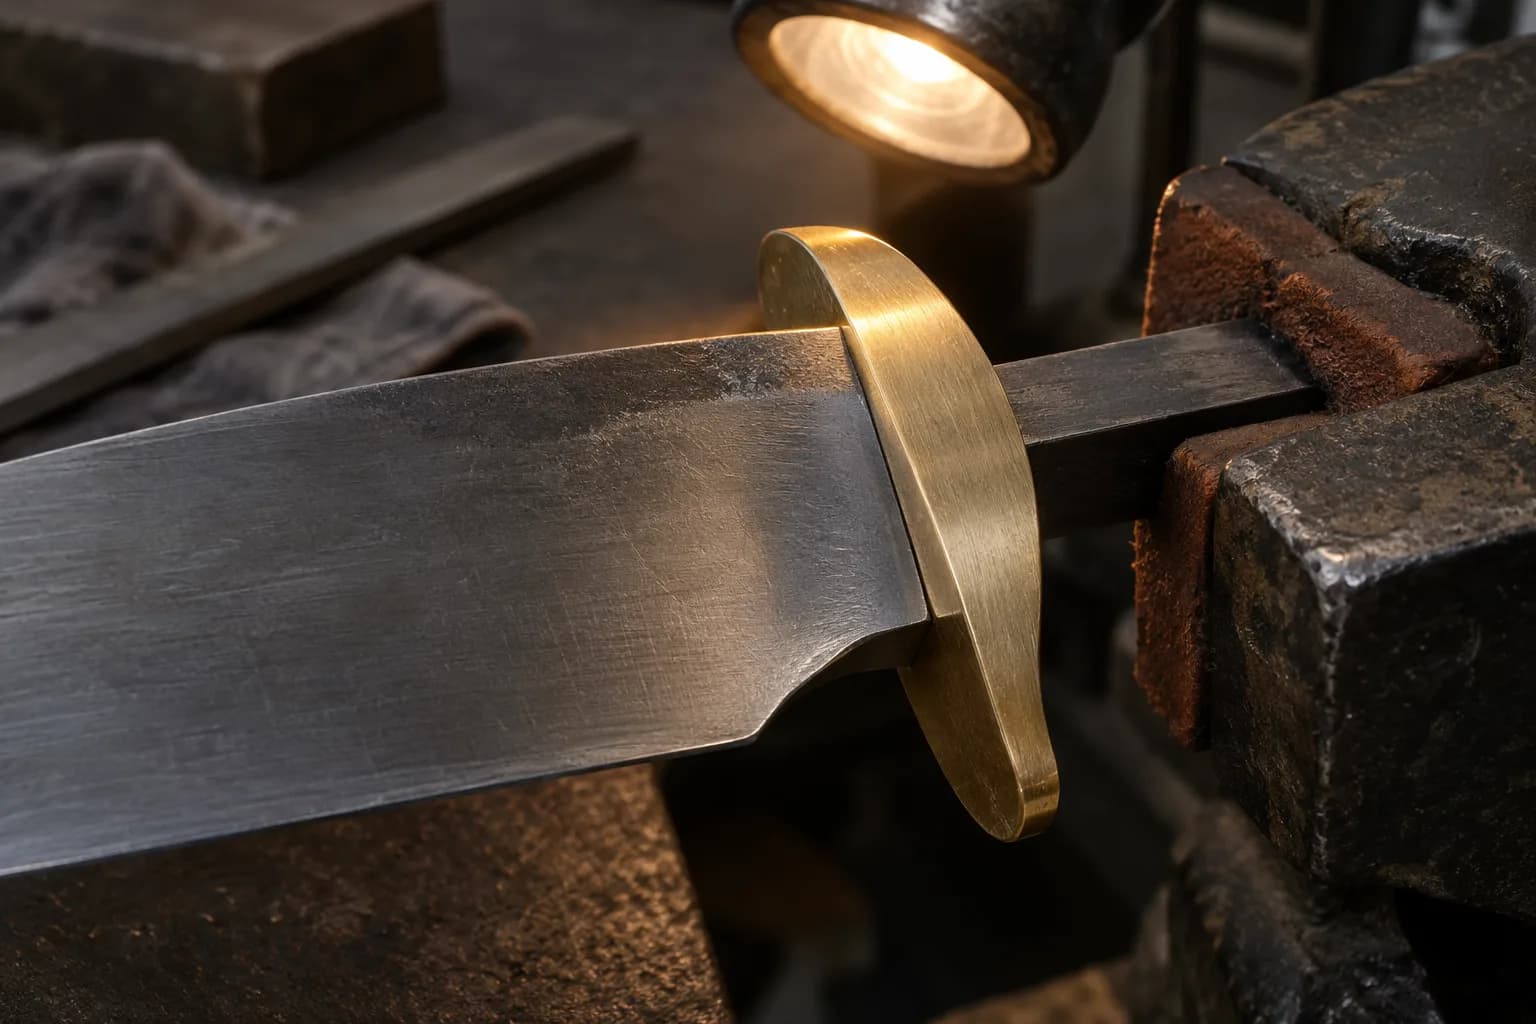
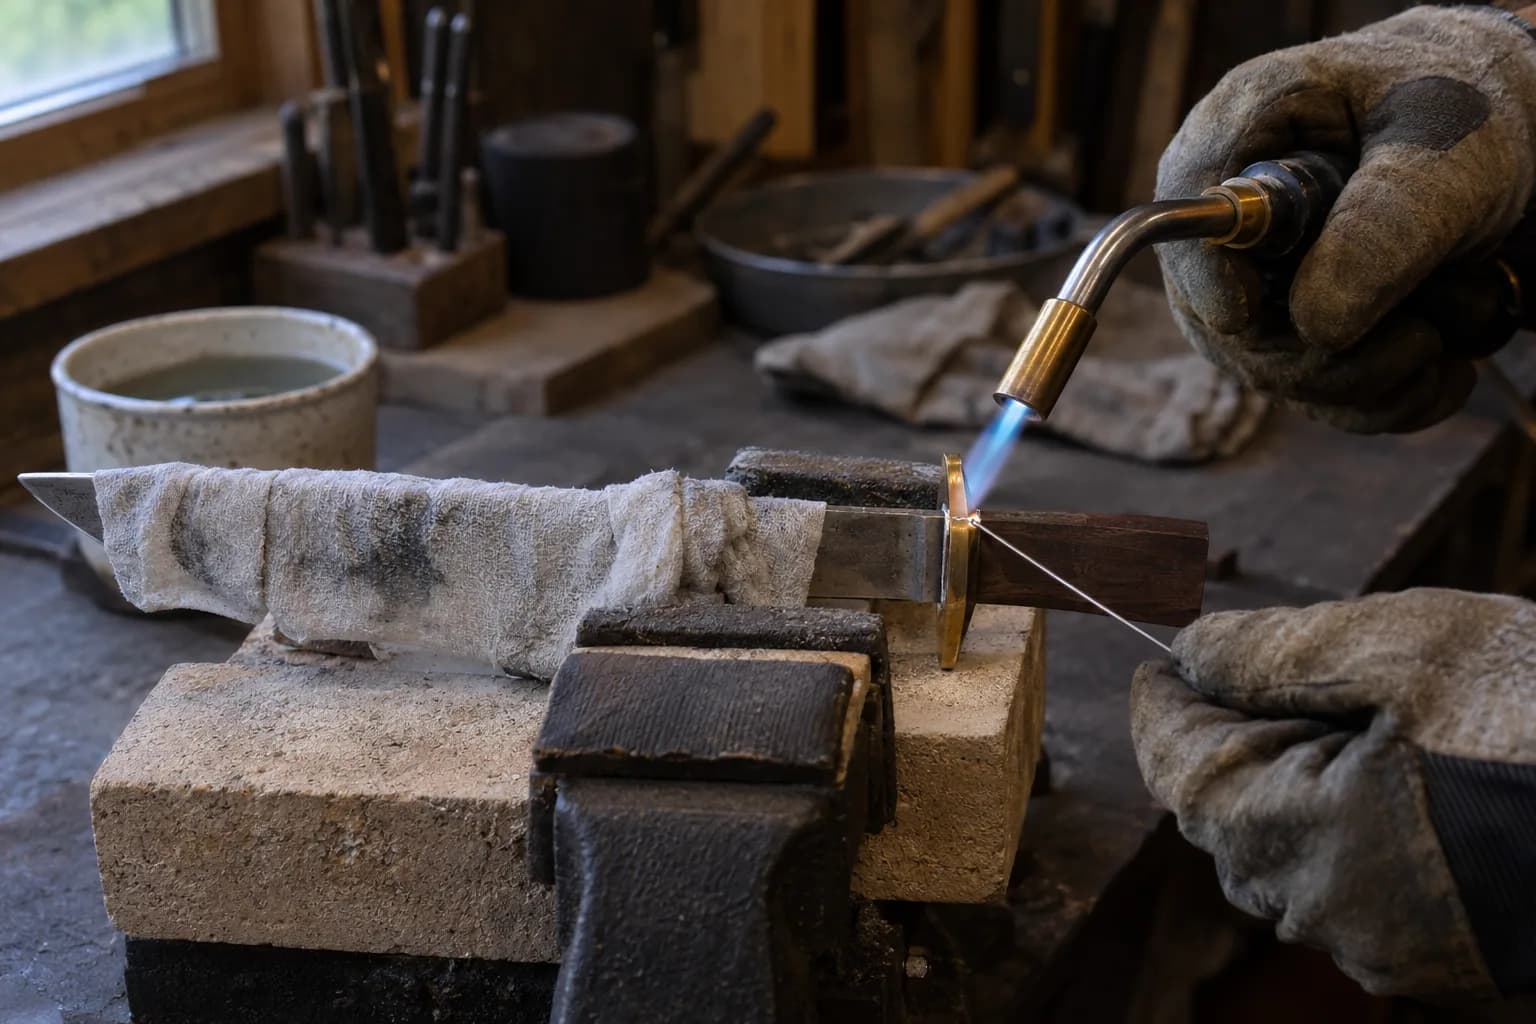
Three honest options. Low-temperature silver-bearing soft solder: the traditional seal-and-secure — flux, heat the GUARD not the blade (protect the temper; a wet wrap on the blade is cheap insurance), sweat a clean fillet, and the joint seals against moisture forever. Pinned: cross-pin through guard and tang, invisible after peening and finish. Mechanical-only: the press fit plus the handle’s compression holds everything — common on hidden-tang builds where the pommel draws the whole stack tight. Kitchen and wet-duty knives favor sealed joints; takedown designs favor mechanical. All three appear on fine knives; pick for the build, not the forum argument.
Final-shape the guard ON the knife — profile, ease and polish it as part of the assembly so its lines flow into handle and blade (masking tape armors the blade through all of it). File-to-shape, then the slack belt’s gentlest passes, then hand grits. The fitted guard’s payoff is the moment a buyer runs a thumbnail across the joint and finds nothing: no gap, no glue line, no excuse. That thumbnail moment is the sale.
Keep reading
Three more from the same bench.
Most Western knives use a double bevel edge without anyone thinking twice about it, but single bevel (chisel ground) edges show up often enough…

Two knives can share the same steel, grind type, and blade shape and still perform completely differently, because of stock thickness and how that…
Sharpening is where knifemaking gets humbled: you can grind a flawless blade and still hand someone a knife that won’t slice paper. The good news …
Same bench
I machine the parts, hand-assemble, track and test Torus grinders in Sterling, Illinois. Most orders ship in seven to ten business days from time of order.

Current dual-axis platform with a fiber-laser-cut 6061 chassis and single-knob tracking.

Current dual-axis platform with a steel chassis, more mass and less vibration.

Prior-design aluminum chassis, 90-degree tilt and 1.5-inch tooling arms.

One-man shop
I answer my own email. Tell me the steel, the machine and what it is doing, and I will tell you what I would try next.