Introduction
Overview of 2×72 Knife Grinder
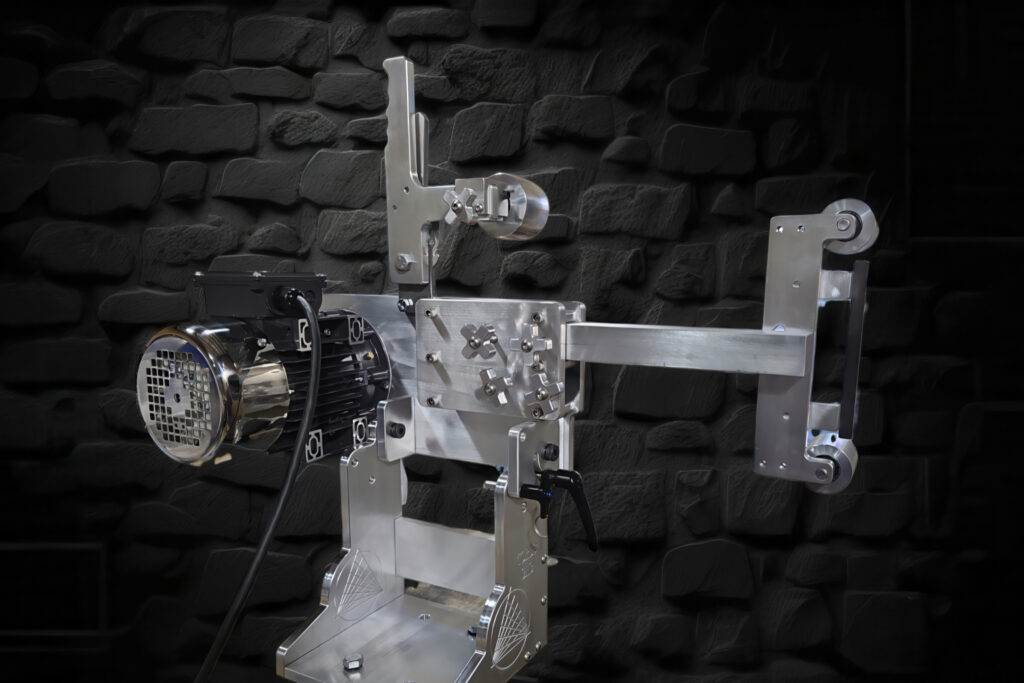
In the realm of blade making, the 2×72 knife grinder stands out as an indispensable tool for both novice makers and seasoned professionals. This piece of equipment offers a versatile platform for grinding, shaping, and sharpening a variety of blades, making it adaptable for different styles and applications. A 2×72 knife grinder typically features a 72-inch long belt that allows for a wide range of surface area and grinding capabilities, enabling users to achieve tailored finishes on their blades. Its size is not just about length; the dimensions allow for multiple grits of belts to be used, accommodating everything from rough shaping to fine polishing. Key benefits of a 2×72 knife grinder include:
- Versatility: Capable of handling different materials and grinding styles.
- Efficiency: Provides quicker results than traditional hand tools.
- Precision: Offers significant control over the grinding process, allowing for sharper and more refined edges.
Overall, this tool has become a staple in the workshops of bladesmiths and hobbyists alike, revolutionizing the way knives are crafted and maintained.
Importance of Precision in Blade Making
When it comes to knife making, precision is not just a luxury; it’s a necessity. The difference between a mediocre blade and a high-performance tool often boils down to the meticulousness involved in the grinding process. A well-made knife can elevate a simple cooking experience, enhance outdoor adventures, and increase safety during usage. Precision in blade making encompasses several critical aspects:
- Edge Geometry: The angle at which the edge is ground affects the blade’s sharpness and durability. For instance, a steep angle is ideal for cutting, while a shallower angle offers durability.
- Surface Finish: The quality of the surface finish, which is achieved through the grinding process, influences both aesthetic appeal and functionality. A smoother finish reduces friction, enhancing cutting efficiency.
- Heat Treatment Integration: Precise grinding enables better integration with heat treatment processes, ensuring the inner molecular structure of the steel achieves optimal hardness without compromising toughness.
The importance of being precise extends beyond aesthetics; it also impacts the performance and safety of the blade. Blades that have been crafted with precision tend to have:
- Longer life spans due to better material integrity.
- Enhanced cutting performance, enabling the user to perform tasks more effectively.
- Reduced wear and tear during usage, promoting safety and reliability.
In conclusion, the 2×72 knife grinder provides not only a platform for grinding but also a pathway to achieving the precision necessary for high-quality blades. As users navigate the intricacies of blade making, understanding the importance of precision becomes foundational in their pursuit of mastery in this craft.
Understanding the 2×72 Knife Grinder
Components and Features
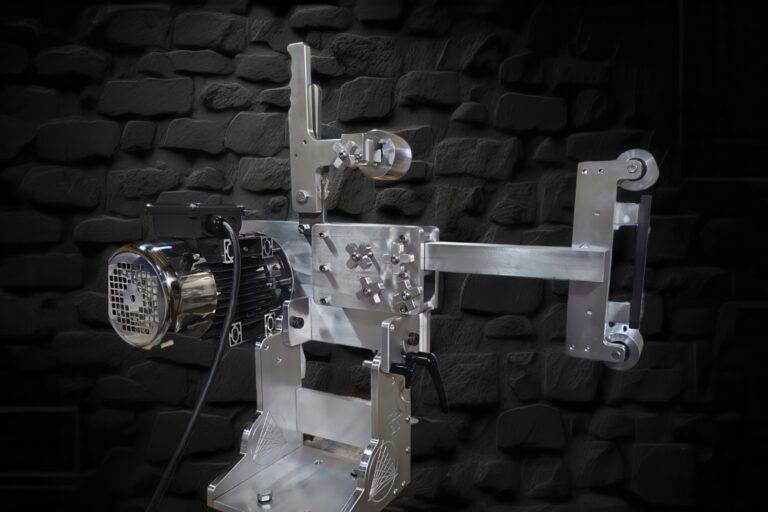
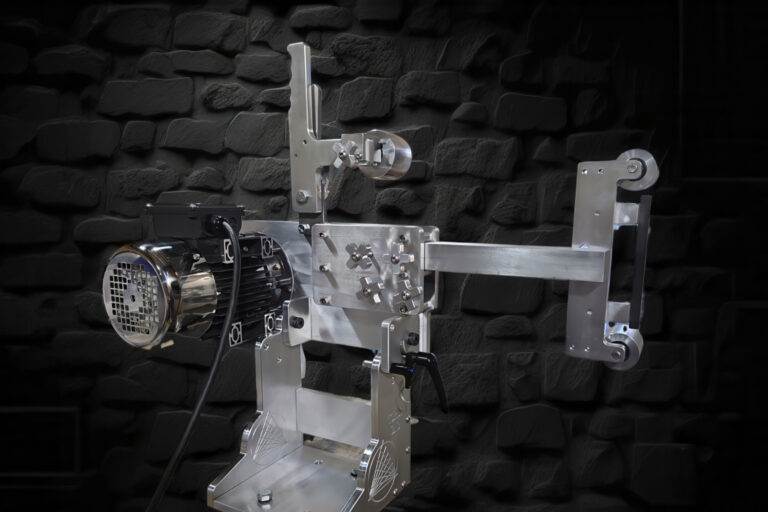
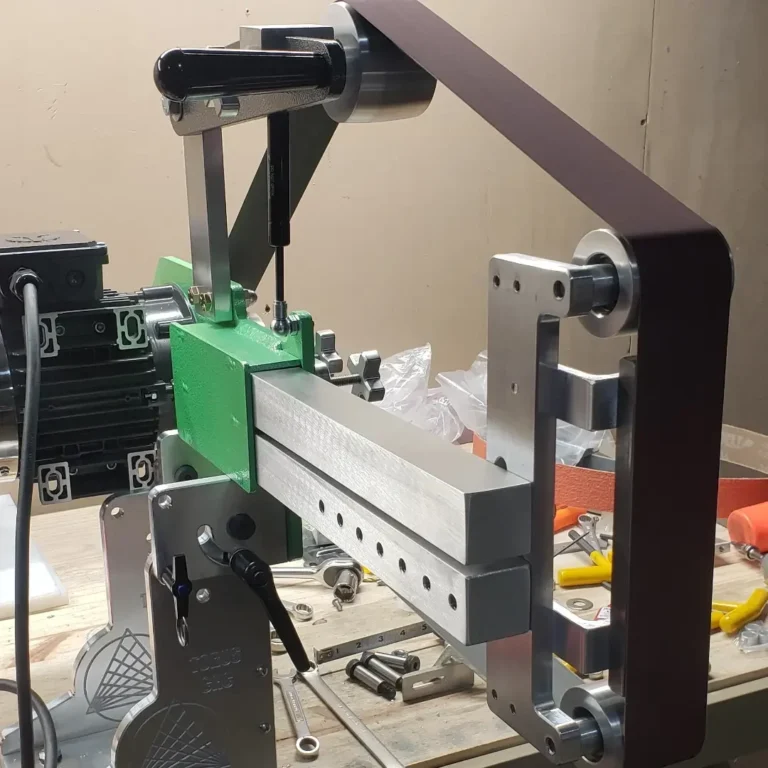
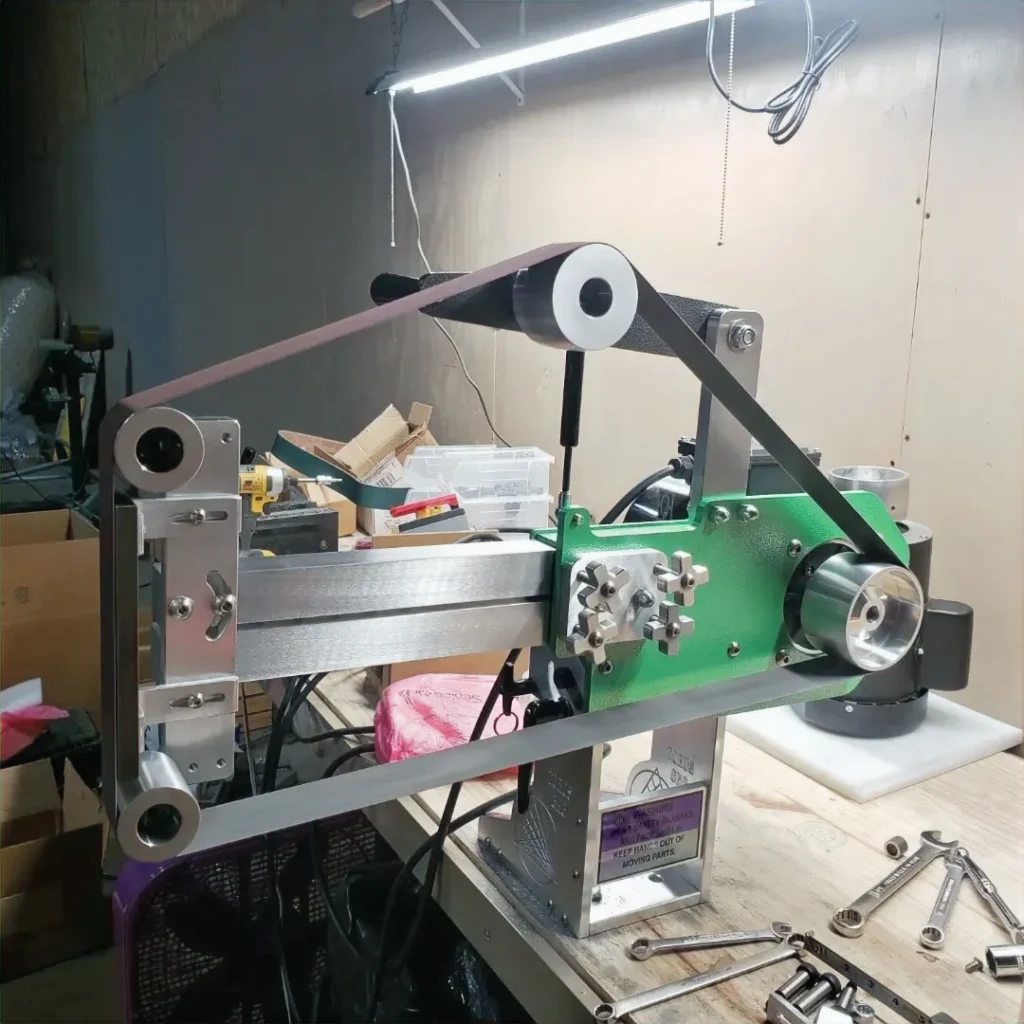
To fully appreciate the functionality of the 2×72 knife grinder, it’s important to understand its various components and features. This know-how not only aids in optimal usage but also enhances the overall grinding experience. The primary components of a typical 2×72 knife grinder include:
- Frame: The sturdy frame provides the backbone of the grinder, ensuring stability during operation. A well-built frame reduces vibrations, which can affect the precision of grinding.
- Motor: The heart of the grinder; a powerful motor drives the belt and determines the speed at which it operates. Motors can vary in horsepower, typically ranging from 1 to 3 HP, depending on the type of work.
- Platen: The flat surface that supports the belt, the platen allows for flat grinding of the blade and assists in achieving even surfaces and precise angles.
- Belt: The 2×72 belt comes in various grits, which dictate the roughness or smoothness during grinding. Users can interchange belts quickly to adapt to their needs.
- Tracking Mechanism: This feature keeps the belt properly aligned during operation, preventing slippage and ensuring even wear and tear.
By understanding these components, users can better maintain their grinders and troubleshoot any issues that may arise.
Safety Measures and Precautions
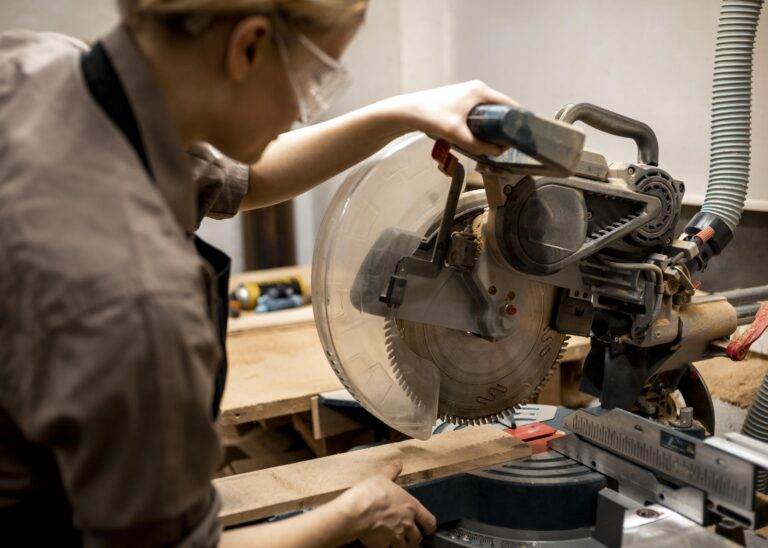
While the 2×72 knife grinder is a powerful tool for any blade maker, with that power comes the responsibility of using it safely. Working with sharp blades and high-speed machinery requires an awareness of best safety practices. Here are several critical safety measures to adopt when using a 2×72 knife grinder:
- Personal Protective Equipment (PPE):
- Safety Goggles: Protect the eyes from metal shavings and debris.
- Hearing Protection: Long grinding sessions can stress hearing due to the noise produced.
- Respirator or Dust Mask: Prevent inhalation of potentially harmful dust.
- Proper Workstation Setup:
- Ensure a clean and clutter-free workspace.
- Maintain proper lighting to enhance visibility during grinding.
- Keep flammable materials away from the workstation.
- Familiarize with the Grinder:
- Read the user manual, understand the functionalities, and get comfortable with each part of the machine before starting operation.
- Regularly inspect belts and components for signs of wear or damage.
- Mindful Operation:
- When starting the grinder, stand clear until the belt reaches full speed.
- Always secure the workpiece before grinding to avoid slips or accidents.
- Avoid wearing loose clothing or accessories that could become entangled in the moving parts.
In summary, understanding the components and features of the 2×72 knife grinder facilitates more effective use while adhering to essential safety precautions ensures a risk-free working environment. The combination of these factors contributes to a more satisfying and productive blade-making experience, keeping both the craftsman and their surroundings safe.
Selecting the Right Materials for Blades
Types of Steel for Different Applications
When it comes to blade-making, the choice of steel is fundamental to the functionality and longevity of the finished product. Not all types of steel are created equal; each type possesses distinct properties that make it suited for various applications. Here’s a breakdown of some common types of steel used in blade making and their typical applications:
- Carbon Steel:
- Characteristics: Contains carbon as the primary alloying element, enhancing hardness and edge retention.
- Applications: Excellent for kitchen knives and outdoor tools. However, it is prone to rusting and requires regular maintenance.
- Stainless Steel:
- Characteristics: Contains chromium, which enhances corrosion resistance but may reduce edge sharpness slightly.
- Applications: Highly popular for kitchen knives and surgical instruments due to their resistance to corrosion and staining.
- High Carbon Stainless Steel:
- Characteristics: Combines the hardness of carbon steel with the corrosion resistance of stainless steel.
- Applications: Ideal for high-performance culinary knives and specialized outdoor equipment, offering the best of both worlds.
- Tool Steel:
- Characteristics: Designed to withstand high levels of wear and deformation, often containing elements like tungsten and molybdenum.
- Applications: Commonly used in manufacturing heavy-duty knife blades, chisels, and molds.
Selecting the right steel type based on the intended use and required properties can vastly enhance the effectiveness of the blade. It’s essential to consider factors such as expected usage, maintenance routines, and personal preferences when making this important decision.
Importance of Heat Treatment
While selecting the right type of steel lays the groundwork for a superior blade, heat treatment is an equally crucial step that brings out the desired characteristics of the material. Proper heat treatment involves heating the steel to a specific temperature and then cooling it rapidly, which alters the molecular structure of the steel, enhancing its toughness and hardness. Here’s why heat treatment is important:
- Toughness: Heat treatment processes increase the steel’s toughness, enabling it to withstand impacts and resist chipping during use.
- Hardness: Properly heat-treated steel achieves higher hardness levels, allowing the blade to maintain its edge longer and reduce sharpening frequency.
- Resistance to Wear: Heat treatment significantly contributes to the wear resistance of the steel. Blades that have undergone this process perform better under strenuous conditions and retain their cutting ability longer.
- Customization: Different heat treatment methods, such as quenching and tempering, can be tailored to achieve specific qualities in the blade, depending on its intended use.
In conclusion, selecting the right materials for blade-making—specifically steel types and heat treatment processes—plays a pivotal role in creating a high-quality cutting tool. Knowledge of these factors can guide makers toward producing blades that not only meet performance standards but also stand the test of time. When a bladesmith understands the intricacies of materials and treatments, they can create knives that are both effective and durable, elevating their craftsmanship to new heights.
Grinding Techniques for Sharp Blades
Correct Angles and Pressure
Achieving a razor-sharp edge on a knife is an art that hinges on mastering the correct angles and applying the right amount of pressure during grinding. The angles at which a blade is ground determine its cutting performance and longevity. Here’s a closer look at how angles and pressure play crucial roles in the grinding process:
- Angle Selection:
- A typical grinding angle for kitchen knives ranges from 15 to 20 degrees. For example:
- 15 Degrees: Ideal for slicing and precision work. These angles result in a sharper edge, but they may chip more easily during tough tasks.
- 20 Degrees: Provides a balance between sharpness and durability, making it suitable for general use and tasks that require more toughness.
- A typical grinding angle for kitchen knives ranges from 15 to 20 degrees. For example:
- Applying Pressure:
- In terms of pressure, the aim is to maintain even and controlled force throughout the grinding process.
- Light Pressure for Fine Grinding: When refining an edge, light pressure allows for a smoother finish and minimizes overheating.
- Increased Pressure for Initial Grinding: During rough shaping, more pressure is beneficial to efficiently grind away material, but be cautious of overdoing it, as too much force can lead to uneven wear or damage to the blade.
- In terms of pressure, the aim is to maintain even and controlled force throughout the grinding process.
Understanding how to set and maintain the correct angle, as well as moderate pressure, can make all the difference in achieving a sharp, durable blade. Practicing these techniques will help build the muscle memory necessary for effective grinding.
Tips for Achieving Consistent Grind Lines
Consistency in grind lines doesn’t just enhance the aesthetic appeal of a blade; it’s also indicative of good craftsmanship and precision in technique. Here are several strategies to maintain consistent grind lines throughout the grinding process:
- Use a Belt Tracking System: Ensure the grinder’s belt is properly aligned and consistently tracks straight to maintain uniform grind lines. Adjust the tracking if you notice the belt starting to veer.
- Steady Hand Positioning: Keep your hands steady while grinding to maintain a consistent angle. Utilizing jigs or guides can be a great way to ensure uniformity and can minimize fatigue during longer grinding sessions.
- Regularly Change Grind Belts: Ensuring you have fresh belts of varying grits will keep surfaces clean and provide better finishing quality. Worn belts can produce inconsistent results leading to uneven grind lines.
- Practice Controlled Movements: Treat the grinding process like a dance; smooth and controlled movements lead to the best results. Instead of pressing too hard, allow the grinder to do the work, effectively leveraging its capabilities.
- Compare and Adjust: After grinding, take a moment to visually inspect your work. If you see areas with inconsistent grind lines, adjust your technique accordingly for the next pass or session.
In summary, mastering the techniques of correct angles and pressure, coupled with achieving consistent grind lines, transforms the blade-making experience. These essential skills not only ensure that your knives perform exceptionally but also elevate the overall quality of your craftsmanship. As with any skill, continual practice will yield refinement and mastery over time, ultimately leading to the creation of superior blades that stand out in both function and form.
Polishing and Finishing Touches
Importance of Proper Sanding
After the grinding stage, one might think that the knife is nearly finished, but polishing and proper sanding are just as critical as the earlier steps in creating a high-quality blade. Proper sanding plays an instrumental role in ensuring that the blade has an even surface, enhancing both its aesthetic appeal and performance. Here’s why proper sanding is essential:
- Surface Preparation: Sanding smooths out any imperfections left from the grinding process, preparing the blade for the polishing stage. This helps to eliminate scratches and inconsistencies that can disrupt the final appearance.
- Grain Direction: Understanding the grain direction of the steel is crucial. Sanding in the same direction as the grain, rather than against it, helps maintain the integrity of the blade and minimizes the risk of creating new scratches.
- Grit Transition: Utilizing a progression of sanding grits—from coarse to fine—allows for a smoother surface finish. A common approach is:
- Start with coarse grits (e.g., 120-220) for initial smoothing.
- Gradually move to mid-range grits (e.g., 400-600) for finer smoothing.
- Finish with ultra-fine grits (e.g., 1000-2000) for a mirror-like finish.
- Attention to Detail: Taking the time to sand properly can significantly improve the final look and feel of the knife. A well-sanded blade is not just more appealing; it’s also less prone to corrosion, as smoother surfaces are less likely to trap moisture.
Proper sanding can transform a good blade into a great one. The visual and tactile aspects of the finish enhance overall user satisfaction, creating a tool that looks as sharp as it performs.
Buffing and Polishing Methods
Once sanding is complete, the next step involves buffing and polishing, which can truly elevate the knife’s appearance and performance. These final touches are where craftsmanship shines, and there are several effective methods to achieve a professional finish.
- Buffing Wheels:
- Using buffing wheels with polishing compounds is one of the most effective methods for achieving a high-gloss finish.
- Choose soft wheels for the final polish and harder wheels for the initial buffing phase. Be sure to use the appropriate polishing compound that matches your metal type, such as:
- Tripoli: Good for removing scratches and preparing the surface.
- Rouge: Ideal for achieving a mirror finish.
- Hand Polishing:
- For delicate areas or intricate designs, hand polishing with cloths or polishing sponges allows for greater control. Use a polishing compound along with a soft cloth to buff the surface lightly.
- Regularly change or flip the cloth to avoid reintroducing any abrasives.
- Mechanical Polishers:
- Rotary or orbital polishers can speed up the process while providing consistency.
- It’s important to use these tools with care; too much pressure or speed can lead to uneven finishes or damage to the blade.
- Final Inspect and Clean:
- After polishing, inspect the knife to ensure there are no remaining scratches or imperfections. Use a mild cleaner to remove any leftover polishing compound, which can detract from the blade’s performance.
In conclusion, polishing and finishing touches transform a well-crafted blade into a high-quality tool that is not only functional but also visually appealing. Combining proper sanding with effective buffing and polishing methods ensures that the knife will perform beautifully and continue to impress throughout its lifecycle. The attention given during these finishing stages reflects the skill and dedication of the bladesmith, making every knife a work of art ready for action.


