

Mosaic Damascus and the Accordion Cut
Mosaic damascus composes a picture in the bar's END grain - which the accordion cut brings to the blade face: deep angled cuts from alternating sides leave a connected zigzag spine, the bar unfolds flat at heat like a paper fan, and tears at the fold bottoms get fluxed and welded closed during flattening. Prove the mosaic with an end etch first; grind (don't heavy-forge) the opened bar to shape.
Mosaic damascus is where pattern welding becomes picture-making: bars composed so that an image — stars, crosses, W-clusters, even letters — lives in the bar’s end grain, then brought to the blade’s face by clever geometry. The advanced patterns guide introduced the composition side; this guide covers the move that makes it wearable: the accordion cut.
The Mosaic Problem
Compose a beautiful cross-section — W’s, stacked squares, a canister composition, bundled bars — and physics hands you a joke: the picture faces the ends of the bar, and blades are ground on the faces. Grinding into the face just shows stripes. Three escapes exist: tile it (slice the bar like bread and weld the slices face-up onto a backing — strong for bolsters, fiddly for blades), loaf/radial tricks, or the elegant standard: accordion.
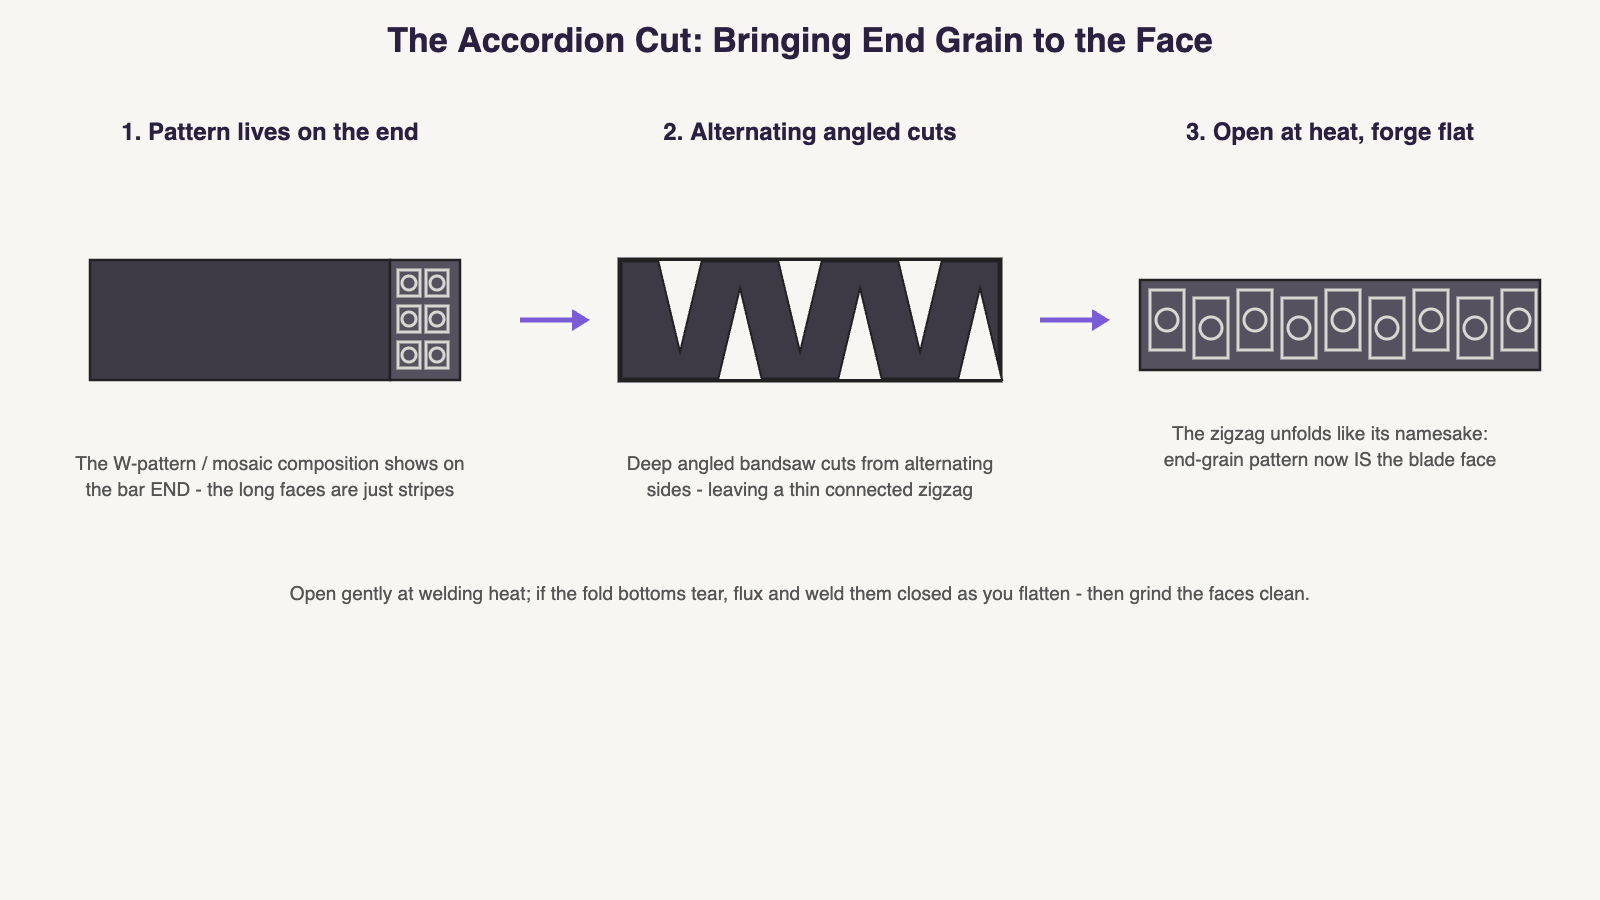
The Accordion Cut, Step by Step
- Compose and weld your mosaic bar — and prove it first: grind and etch the end to see what you actually made. Every weld must be solid; the accordion stresses all of them.
- Square and true the bar. Accordion wants a clean rectangular section, typically wider than thick.
- Cut the zigzag. On the bandsaw (or angle grinder, patiently): deep angled cuts alternating from opposite faces — each cut stopping short of the far side, leaving a continuous serpentine spine of connected steel. Angled cuts (rather than straight crosscuts) are what let the bar unfold flat. Layout matters: even spacing = even pattern repeat down the finished blade.
- Open it hot, gently. At a bright, even heat, open the zigzag over the anvil’s edge/horn like unfolding a paper fan — coaxing, not smashing. You now have a longer, thinner bar whose surface is entirely former end-grain.
- Flatten at welding heat, healing as you go. The classic technique straight from the smiths who teach this: flatten at welding heat, and if the fold-bottoms tear slightly, flux and gently weld them closed during the flattening passes. Firm, flat blows; let the bar become a bar again.
- Grind clean and build the blade. The unfolded surface carries hammer marks and shallow valleys — grind to clean steel (stock-removal from here is the norm; heavy forging re-distorts the picture you worked for). Then heat treat per your steels and etch deep.
Design Notes for First Mosaics
- Bold beats intricate at first: a 4-way W cluster or simple star reads beautifully; fine detail smears in the unfolding.
- Budget pattern distortion: the accordion stretches the picture slightly at each fold — smiths cut test accordions from expendable bar ends to learn the stretch.
- Powder fills gaps: complex compositions often ride inside a canister with powder filling the voids between composed elements — the two techniques are natural partners.
- For the ceiling of this art, study Robert Eggerling’s work (linked from the advanced guide) — then go weld a simple star and be patient with yourself.
Sources
- American Bladesmith Society — Mosaics: A Different Technique
- BLADE Magazine — Ed Caffrey mosaic damascus (video walkthrough)
- Kitchen Knife Forums — mosaic damascus for thin blades
Common Mistakes
Accordioning a bar with marginal welds. Straight crosscuts instead of angled ones (the bar won’t unfold flat). Uneven cut spacing giving a lurching pattern repeat. Smashing the fan open instead of coaxing at bright heat. Heavy forging after opening and smearing the picture. Starting with intricate detail instead of a bold simple motif.